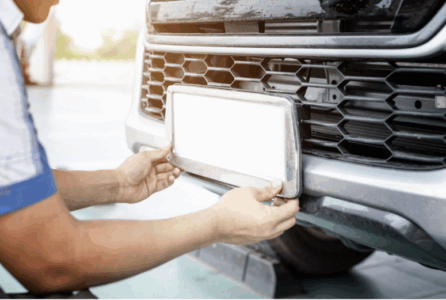
How To Fit Number Plates: A Step-by-Step Guide for UK Drivers
Make Sure Your New Number Plate Is Fitted Securely and Legally
Whether you’ve just purchased a replacement number plate, personalised your registration number, or your old one is worn or broken, knowing how to fit number plates is essential for every UK vehicle owner. While it might seem like a simple job, fitting them incorrectly could result in the plate falling off, or worse, a fine.
At JDM Plates, we supply a wide range of fully road-legal number plates and guide on attaching them safely and securely. In this blog, we’ll walk you through a detailed, step-by-step guide to help you fit number plates using different methods, whether you’re using sticky pads, screws, or a number plate holder.
Tools You’ll Need Before You Start
Before diving into the fitting process, make sure you have the following tools and accessories on hand:
- New plates (front and rear) from a registered supplier like JDM Plates
- Fitting kits or adhesive pads (supplied with many new plates)
- Electric drill and suitable drill bit (if you’re using screws)
- Screws and screw covers
- Sticky pads or double-sided adhesive tape
- Screwdriver, wallpaper scraper, or plastic trim remover
- A measuring tape and a pencil for marking
- Cleaning supplies (cloth, surface cleaner, and alcohol wipes)
Having the right tools makes the job quicker and cleaner and ensures your new registration plates are securely fixed to your vehicle.

Step-by-Step: How to Fit Number Plates With Screws
Using screws is one of the most secure ways to attach acrylic number plates and is ideal if your original plates were already screwed in place.
Step 1: Remove the Old Plates
Use a screwdriver to loosen and remove the old screws. If there’s adhesive holding the old plates, gently pull or use a wallpaper scraper to lift them off. Clean the surface and remove any old sticky pads.
Step 2: Mark the Drill Holes
Use your new number plate as a template, aligning it with the existing screw holes on your car. Mark the position of the holes using a pencil.
Step 3: Drill the Holes
Carefully drill through the marked points using an electric drill and an appropriate drill bit. Always drill from the back of the plate through to the front to avoid damaging the acrylic and pushing the reflective away from the acrylic front face. From experience, we always recommend the correct size masonry drill bit. Masonry drill bits are more blunt so will burn through the number plate instead of cutting. Also, as the head of the masonry drill bit is wider, unlike a metal or wooden bit, then you are less likely to crack the plate mid-way through drilling.
Important: DO NOT DRILL THROUGH 4D OR GEL CHARACTERS AS THIS WILL DAMAGE THE PLATE!
Step 4: Attach the Plate
Align the new plates with the existing holes on your vehicle, insert the new screws, and secure them tightly. Apply pressure but avoid over-tightening, as this could crack the plate.
Step 5: Cover the Screws
Finish by adding screw covers to match your plate’s background (white for the front, yellow for the rear) for a neat, professional finish.
How to Fit Number Plates Using Sticky Pads
If you’d prefer not to drill holes or your car doesn’t have existing screw mounts, sticky pads or adhesive pads are an easy alternative.
Step 1: Clean the Surface
Thoroughly clean and dry the area where the plate will be mounted. Use alcohol wipes to remove any residue or grease.
Step 2: Apply the Adhesive Pads
Place sticky pads evenly across the back of the number plate, typically one in each corner and one or two in the centre.
Step 3: Attach the Plate
Position the plate carefully on the car. Once aligned, apply pressure firmly across the surface for 30–60 seconds to secure the bond.
Motorcycle Number Plates & Sticky Pads
It is NOT advised to secure motorcycle number plates with sticky pads alone unless as a last resort or a full backing plate – which is 100% secured to the bike – is used. Think about it, motorcycle number plates when stuck on using sticky pads may eventually fly away due to the wind resistance, up to 70mph and beyond, the number plate will be subject to. Over time, the sticky pads WILL eventually work loose with these forces. With this in mind, it is highly recommended to either screw motorcycle plates or screw a backing plate which is the same size as the number to the bike, and sticky the number plate to the backing plate so the actual number plate, and subsequently sticky pads, are not subject to any wind resistance.
Top Tip: Once the plate is stuck on, repositioning can be difficult. Make sure it’s correctly aligned before pressing it into place.
Using Number Plate Holders
Number plate holders are reusable plastic or metal frames that allow you to change your registration plates easily without needing sticky pads or screws every time.
Why Choose Plate Holders?
- Ideal for show plates or switching between private plates and standard plates
- No drilling required
- Plates can be removed and swapped in seconds
Simply follow the product instructions provided with your holder. Most come with clips or a sliding mechanism to secure the new plates in place.
Which Fitting Method Should You Use?
Choosing the right method depends on your vehicle, preference, and how often you intend to change your plates:
| Method | Pros | Cons |
| Screws | Very secure, traditional fit | Requires drilling, less tidy finish |
| Sticky Pads | Clean look, easy install | May come loose in extreme weather |
| Plate Holders | Swappable, no drilling | Slightly bulkier appearance |
How to Replace Existing Number Plates
The process is largely the same if you’re swapping out old number plates for replacement number plates. Just be sure to:
- Remove old plates carefully to avoid damaging the paintwork
- Clean the surface thoroughly
- Choose your preferred method to fit number plates
- Dispose of old plates responsibly, never sell or reuse them illegally
Final Checks Before You Hit the Road
Once your plates are attached:
- Check that they are level and properly aligned
- Make sure they are securely fitted, with no movement when lightly tugged
- Ensure the characters are clear and unobstructed
- Confirm your plates follow all UK number plate regulations (font, spacing, colour, etc.)
Driving with improperly attached or unreadable plates can lead to a fine, MOT failure, or legal trouble.
Professional Fitting Services from JDM Plates
If you’re not confident with the fitting process or want a clean, professional finish, JDM Plates offers a fitting service for all UK road users. Our team can install your new number plate using your preferred method, ensuring full compliance with legal standards.
Explore our range of replacement number plates, accessories, and fitting kits at JDM Plates, or contact us via our Contact Page to schedule a fitting or ask for advice.

